In our increasingly digital world, the significance of computer science cannot be overstated. From powering our smartphones to enabling complex simulations and innovations, computer science underpins many facets of modern life. Aspiring to become proficient in this field demands a structured and comprehensive curriculum. In this article, we will delve into the essential components of a curriculum required to learn computer science thoroughly.

Introduction to Computer Science

Every journey begins with a single step, and in the realm of computer science, that step involves understanding its fundamentals. The introductory phase provides an overview of key concepts, historical context, and the fundamental ideas that shape the discipline.

1. Introduction to Programming: Learning the basics of programming languages, variables, data types, and control structures. Python, Java, or C++ are popular languages for beginners.

2. Algorithms and Data Structures: Understanding algorithms, their efficiency, and implementing fundamental data structures like arrays, linked lists, stacks, and queues.

3. Computer Architecture: Gaining insight into the internal workings of computers, including the CPU, memory, input/output systems, and how they collectively execute programs.

Core Concepts in Computer Science

With the foundational knowledge in place, the next phase delves into the core concepts that define computer science.

1. Object-Oriented Programming (OOP): Delving deeper into OOP principles, design patterns, and concepts like inheritance, polymorphism, and encapsulation.

2. Operating Systems: Exploring the functionality of operating systems, including process management, memory management, file systems, and how they interact with hardware.

3. Databases: Understanding database systems, SQL, normalization, and working with data to develop efficient and scalable data storage solutions.

4. Computer Networks: Learning about network protocols, architecture, routing, and security to grasp how data is transmitted across the internet.

5. Software Engineering: Delving into the software development lifecycle, version control, testing, debugging, and best practices for building robust and maintainable software.

Specializations in Computer Science

As one progresses in their learning journey, they can start to specialize in specific subfields based on their interests.

1. Artificial Intelligence and Machine Learning: Exploring AI concepts, neural networks, and algorithms that enable machines to learn from data.

2. Web Development: Mastering front-end (HTML, CSS, JavaScript) and back-end (server-side scripting, databases) technologies to create interactive and dynamic web applications.

3. Cybersecurity: Understanding security threats, cryptography, ethical hacking, and developing strategies to protect digital assets.

4. Database Management: Diving deeper into advanced database topics like data warehousing, data mining, and big data management.

5. Graphics and Game Development: Learning about computer graphics, 3D modeling, and the development of interactive games and simulations.

Advanced Topics and Research

For those aiming to push the boundaries of knowledge, advanced topics and research in computer science offer an exciting path.

1. Computer Vision: Exploring how computers can interpret and understand visual information from the world, is a critical component in fields like autonomous vehicles and image analysis.

2. Natural Language Processing: Investigating how computers can understand, interpret, and generate human language, is crucial for applications like language translation and chatbots.

3. Quantum Computing: Delving into the principles of quantum mechanics to understand and harness the power of quantum computers, which have the potential to solve complex problems much faster than classical computers.

4. Distributed Systems: Studying how to design and manage systems that consist of multiple interconnected computers or nodes, common in cloud computing and large-scale applications.

Practical Projects and Real-World Applications

A comprehensive curriculum in computer science should emphasize practical implementation and real-world applications.

1. Capstone Projects: Engaging in complex, multi-disciplinary projects that incorporate multiple concepts learned throughout the curriculum.

2. Internships and Work Experience: Gaining hands-on experience through internships or part-time work in the industry, applying theoretical knowledge to real-world scenarios.

3. Open Source Contributions: Contributing to open-source projects to collaborate with developers worldwide and improve existing software.

Conclusion

The field of computer science is vast and ever-evolving, making a structured curriculum essential for aspiring computer scientists. From building a strong foundation in programming and algorithms to specializing in areas like AI, web development, or cybersecurity, a well-rounded curriculum provides the tools needed to excel in this dynamic field. By embracing the core concepts, specializing in areas of interest, and delving into advanced topics, individuals can embark on a journey that not only equips them with valuable skills but also empowers them to shape the future through innovation and creativity.

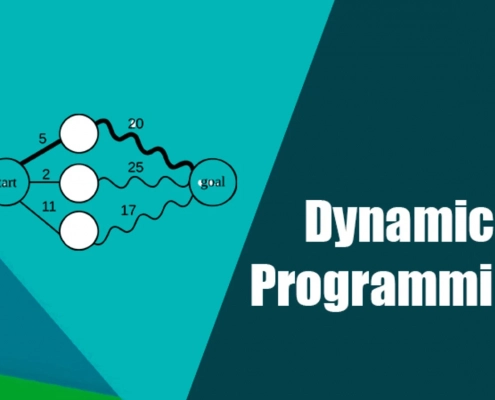
Understanding Dynamic Programming: A Guide with Code Examples

Dynamic Programming (DP) is a powerful technique in computer science and mathematics used to solve a wide range of optimization and combinatorial problems. It’s a method that involves breaking down complex problems into simpler overlapping subproblems, solving each subproblem only once, and storing the results to avoid redundant calculations. This approach greatly improves the efficiency of algorithms and can be applied to various domains, including algorithms for optimization, sequence alignment, and more.

In this comprehensive guide, we’ll explore the fundamental concepts of dynamic programming, provide intuitive explanations, and offer code examples in Python to illustrate how DP can be applied to solve real-world problems.

What is Dynamic Programming?

Dynamic Programming is a method for solving problems by breaking them down into smaller subproblems, solving each subproblem only once, and storing the results in a table or memoization data structure. When a subproblem is encountered again, instead of recalculating its solution, we look up the previously computed result, leading to significant time savings.

The term “programming” in dynamic programming has nothing to do with coding but comes from the word “pro-gramme”, which means a plan or a set of rules. It was coined by Richard Bellman in the 1950s when he was working on optimization problems. Dynamic Programming provides a structured way to find optimal solutions to problems with overlapping subproblems, and it is particularly useful when a problem can be broken down into smaller, similar subproblems.

Key characteristics of dynamic programming:

  1. Optimal Substructure: The problem can be divided into smaller subproblems and the optimal solution to the original problem can be constructed from the optimal solutions of its subproblems.
  2. Overlapping Subproblems: The same subproblems are solved multiple times in a recursive manner. Dynamic Programming stores the results of these subproblems to avoid redundant computation.

Fibonacci Sequence: A Simple DP Example

To grasp the concept of dynamic programming, let’s start with a classic example: calculating the Fibonacci sequence. The Fibonacci sequence is defined as follows:

F(0) = 0
F(1) = 1
F(n) = F(n-1) + F(n-2) for n > 1

We can calculate Fibonacci numbers using recursion, but this approach leads to an exponential number of function calls and is highly inefficient for large `n`. Dynamic programming offers a more efficient solution by avoiding redundant calculations.

Here’s a Python code snippet for calculating Fibonacci numbers using dynamic programming:

def fibonacci_dp(n):
    fib = [0] * (n + 1)

    # Base cases
    fib[0] = 0
    fib[1] = 1

    # Calculate Fibonacci numbers from 2 to n
    for i in range(2, n + 1):
        fib[i] = fib[i - 1] + fib[i - 2]

    return fib[n]

# Example usage
n = 10
print(f"Fibonacci({n}) =", fibonacci_dp(n)) # Output: Fibonacci(10) = 55

In this code, we create an array `fib` to store the Fibonacci numbers. We start by initializing the base cases (`F(0)` and `F(1)`) and then use a loop to calculate Fibonacci numbers from `2` to `n` by summing the previous two values. This way, we avoid redundant calculations, and the time complexity is reduced from exponential to linear (`O(n)`).

Types of Dynamic Programming

Dynamic Programming can be categorized into two main types:

  1. Top-Down (Memoization): In the top-down approach, we start with the original problem and recursively break it down into smaller subproblems. We use a memoization table (usually an array or dictionary) to store the results of already solved subproblems. When a subproblem is encountered, we first check if its solution is in the memoization table. If not, we calculate it and store the result, which can be looked up in future recursive calls.
  2. Bottom-Up (Tabulation): In the bottom-up approach, we start with the smallest subproblems and iteratively build up the solution to the original problem. We use a table or array to store the results of subproblems and fill it in a specific order, typically from the smallest subproblems to the largest. This approach is more efficient in terms of space complexity since we only need to store results for the necessary subproblems.

Both approaches are equivalent and can be used interchangeably, but tabulation is often preferred when it’s straightforward to determine the order in which subproblems should be solved.

Longest Common Subsequence (LCS): A Practical DP Example

Let’s explore a more practical example of dynamic programming: finding the Longest Common Subsequence (LCS) between two sequences. Given two sequences, the LCS is the longest sequence that appears as a subsequence in both sequences. For example, given the sequences “ABCD” and “ACDF,” the LCS is “ACD”.

Here’s a Python code snippet for finding the LCS using dynamic programming:

def longest_common_subsequence(X, Y):
    m = len(X)
    n = len(Y)

    # Create a 2D table to store LCS lengths
    dp = [[0] * (n + 1) for _ in range(m + 1)]

    # Build the dp table
    for i in range(1, m + 1):
        for j in range(1, n + 1):
            if X[i - 1] == Y[j - 1]:
                dp[i][j] = dp[i - 1][j - 1] + 1
            else:
                dp[i][j] = max(dp[i - 1][j], dp[i][j - 1])

    # Reconstruct the LCS
    lcs = []
    i, j = m, n
    while i > 0 and j > 0:
        if X[i - 1] == Y[j - 1]:
            lcs.append(X[i - 1])
            i -= 1
            j -= 1
        elif dp[i - 1][j] > dp[i][j - 1]:
            i -= 1
        else:
            j -= 1

    return ''.join(reversed(lcs))

# Example usage
X = "AGGTAB"
Y = "GXTXAYB"
print("Longest Common Subsequence:", longest_common_subsequence(X, Y))

In this code, we create a 2D table `dp` to store the lengths of LCS for different prefixes of the input sequences `X` and `Y`. We iteratively fill the table by comparing characters from both sequences. If characters match, we increment the length by 1; otherwise, we take the maximum of the LCS lengths from the previous rows and columns. Finally, we backtracked from the last cell to reconstruct the LCS.

Coin Change Problem: An Optimization Challenge

Another classic dynamic programming problem is the Coin Change Problem. Given a set of coin denominations and a target amount, the task is to find the minimum number of coins required to make up the target amount. This problem demonstrates how dynamic programming can be used for optimization.

Here’s a Python code snippet to solve the Coin Change Problem using dynamic programming:

def min_coins(coins, target):
    # Initialize a table to store minimum coin counts
    dp = [float('inf')] * (target + 1)
    dp[0] = 0

    # Calculate minimum coin counts for all amounts from 1 to target
    for amount in range(1, target + 1):
        for coin in coins:
            if coin <= amount:
                dp[amount] = min(dp[amount], dp[amount - coin] + 1)

    return dp[target] if dp[target] != float('inf') else -1

# Example usage
coins = [1, 2, 5]
target = 11
print("Minimum coins required:", min_coins(coins, target))

In this code, we create an array `dp` to store the minimum coin counts for different amounts from `0` to `target`. We initialize the table with infinity except for `dp[0]`, which is set to `0` because no coins are needed to make up zero. We then iterate through all possible amounts and coins, updating the minimum coin counts as we find better solutions. Finally, we return the minimum coin count for the target amount or `-1` if it’s impossible to make the amount with the given coins.

When to Use Dynamic Programming

Dynamic Programming is a powerful technique for solving a wide range of problems, but it’s not always the best choice. Here are some factors to consider when deciding whether to use dynamic programming:

  1. Optimal Substructure: The problem can be broken down into smaller subproblems with the same characteristics.
  2. Overlapping Subproblems: The same subproblems are solved multiple times, leading to redundant computation.
  3. Memoization or Tabulation: Decide whether to use the top-down (memoization) or bottom-up (tabulation) approach based on problem requirements and simplicity.
  4. Time Complexity: DP often reduces the time complexity of problems from exponential to linear or polynomial.
  5. Space Complexity: Consider memory requirements when choosing between memoization and tabulation.
  6. Simplicity: Sometimes, simpler algorithms (e.g., greedy algorithms) may suffice for the problem at hand.

Conclusion

Dynamic Programming is a versatile and powerful technique for solving a wide variety of problems efficiently by breaking them down into smaller subproblems and avoiding redundant calculations. Through this guide, we’ve explored the fundamental concepts of dynamic programming, including optimal substructure and overlapping subproblems, and seen practical examples of how to implement dynamic programming solutions in Python.

As you dive deeper into dynamic programming, you’ll encounter more complex problems and variations of the technique. However, the core principles discussed here will remain valuable in understanding and implementing DP solutions effectively. Whether you’re working on algorithmic challenges or real-world optimization problems, dynamic programming can be a valuable tool in your problem-solving toolkit.

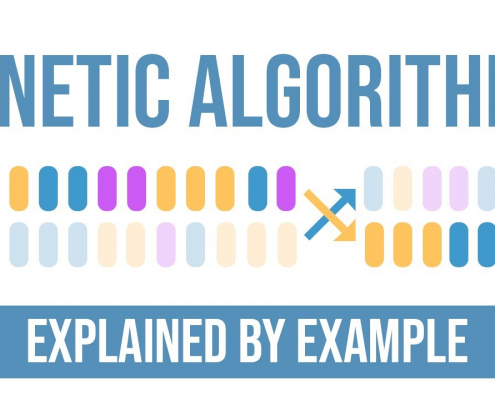
Genetic Algorithm: Evolving the Perfect Sort

Sorting is a fundamental operation in computer science and plays a crucial role in various applications. Traditional sorting algorithms like Bubble Sort, Quick Sort, and Merge Sort have been extensively studied and optimized for efficiency. However, there’s an unconventional approach to sorting called the Genetic Algorithm that takes inspiration from the principles of natural selection and evolution to arrange elements in a desired order.

In this article, you’ll explore the Genetic Algorithm, understand its core concepts, and provide code examples in Python to implement and experiment with it.

Understanding Genetic Algorithms

Before diving into Genetic Sorting, let’s briefly explain the basics of Genetic Algorithms (GAs). GAs are a class of optimization algorithms inspired by the process of natural selection. They are used to find approximate solutions to optimization and search problems.

Here are the key components of a Genetic Algorithm:

  1. Population: A set of individuals (possible solutions to the problem) forms the population.
  2. Fitness Function: A function that assigns a fitness value to each individual, indicating how well it solves the problem. In Genetic Sorting, this function measures how close the arrangement of elements is to the desired order.
  3. Selection: Individuals are selected from the population to become parents based on their fitness. Individuals with higher fitness have a better chance of being selected.
  4. Crossover: Pairs of parents are combined to produce offspring. Crossover mimics genetic recombination, creating new individuals with a mix of their parents’ characteristics.
  5. Mutation: Random changes are applied to some individuals to introduce diversity into the population. This step prevents the algorithm from getting stuck in local optima.
  6. Termination: The algorithm stops when a termination condition is met, such as a maximum number of generations or when a solution of sufficient quality is found.

Now that we have a basic understanding of Genetic Algorithms, let’s dive into Genetic Sorting.

Genetic Sorting Algorithm

The Genetic Sorting Algorithm is a creative approach to sorting a list of elements. Instead of using traditional comparison-based sorting methods, Genetic Sorting employs the principles of evolution to reorder elements gradually. Here’s how it works:

  1. Initialization: Start with a population of randomly ordered lists. Each list represents a potential solution.
  2. Fitness Function: Define a fitness function that measures how close a list’s ordering is to the desired sorted order. One common fitness function is the number of elements in the correct position.
  3. Selection: Choose lists from the current population to serve as parents for the next generation. Lists with higher fitness values have a higher chance of being selected.
  4. Crossover: Combine pairs of parent lists to create offspring. The crossover operation could involve merging parts of two-parent lists to create a new list.
  5. Mutation: Introduce small random changes to some offspring lists to maintain diversity.
  6. Termination: Continue these steps for a specified number of generations or until a solution with the desired fitness is found.

Let’s see how this works in practice with Python code examples.

Python Code for Genetic Sorting

Here’s a Python implementation of the Genetic Sorting Algorithm for sorting a list of integers in ascending order:

import random

def fitness(arr):
    """
    Calculate the fitness of an arrangement by counting the number of
    elements in the correct position.
    """
    return sum(1 for i in range(len(arr)) if arr[i] == i)

def crossover(parent1, parent2):
    """
    Perform crossover to create an offspring.
    """
    # Choose a random crossover point
    crossover_point = random.randint(0, len(parent1) - 1)

    # Create the offspring by combining parent1 and parent2
    offspring = parent1[:crossover_point] + parent2[crossover_point:]

    return offspring

def mutate(arr, mutation_rate):
    """
    Apply mutation to an arrangement with a given probability.
    """
    for i in range(len(arr)):
        if random.random() < mutation_rate:
            j = random.randint(0, len(arr) - 1)
            arr[i], arr[j] = arr[j], arr[i]

def genetic_sort(arr, max_generations=1000, mutation_rate=0.01):
    """
    Sort an array using the Genetic Sorting Algorithm.
    """
    population = [random.sample(arr, len(arr)) for _ in range(100)]

    for generation in range(max_generations):
        population.sort(key=fitness, reverse=True)
        best_arrangement = population[0]

        if fitness(best_arrangement) == len(arr):
            # Found a perfect arrangement
            return best_arrangement

        # Select parents and create offspring
        parents = population[:10]
        offspring = [crossover(random.choice(parents), random.choice(parents)) for _ in range(90)]

        # Apply mutation to the offspring
        for arr in offspring:
            mutate(arr, mutation_rate)

        # Replace the old population with the new one
        population = parents + offspring

    # If no perfect arrangement is found, return the best arrangement
    return population[0]

# Example usage
arr = [5, 2, 9, 1, 5, 6]
sorted_arr = genetic_sort(arr)
print("Original Array:", arr)
print("Sorted Array:", sorted_arr)

In this code:

  • The `fitness` function calculates the fitness of an arrangement based on the number of elements in the correct position.
  • The `crossover` function combines two parent arrangements to create offspring.
  • The `mutate` function introduces random changes to an arrangement with a specified mutation rate.
  • The `genetic_sort` function is the main algorithm that initializes a population of random arrangements and iteratively evolves them until a perfect arrangement is found or a maximum number of generations is reached.

Conclusion

The Genetic Sorting Algorithm is a unique and unconventional approach to sorting that leverages the principles of genetic algorithms. While it may not be the most efficient sorting method for small lists, it demonstrates the power of evolutionary algorithms in solving complex problems.

Keep in mind that Genetic Sorting may not be practical for every day sorting tasks, but it serves as an excellent example of how computational techniques can draw inspiration from nature to solve problems. This algorithm showcases the versatility and creativity of algorithms in addressing a wide range of challenges in computer science and beyond.

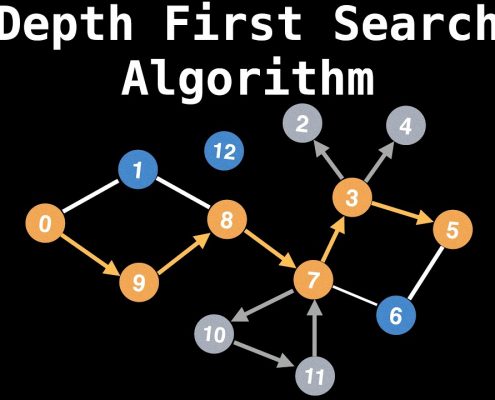
A Guide to Depth-First Search (DFS) Algorithm

In the realm of graph theory and algorithms, the Depth-First Search (DFS) algorithm stands as a fundamental and versatile tool. DFS is used to traverse and explore graph data structures, making it an essential technique for a wide range of applications, including pathfinding, cycle detection, topological sorting, and more. In this comprehensive guide, you will delve deep into the world of DFS, discussing its principles, applications, and providing practical code examples in Python.

Understanding Depth-First Search (DFS)

Depth-First Search, as the name suggests, is a graph traversal algorithm that explores as far down a branch of a graph as possible before backtracking. The primary idea behind DFS is to systematically visit nodes in a graph, marking them as visited and recursively exploring unvisited neighbors until there are no more unvisited nodes. This process allows DFS to traverse the entire connected component of a graph.

Key Components of DFS

Before we dive into code examples, let’s understand the essential components of the DFS algorithm:

  1. Stack (or Recursion): DFS typically employs a stack data structure to keep track of nodes to visit. Alternatively, recursion can be used, as it naturally emulates the behavior of a stack.
  2. Visited Set: To prevent revisiting nodes, a set or array is used to mark nodes as visited.
  3. Graph Representation: The graph to be traversed should be represented appropriately, commonly using an adjacency list or adjacency matrix.

DFS Algorithm Steps

The DFS algorithm can be broken down into the following steps:

  1. Start at a source node and mark it as visited.
  2. Explore an unvisited neighbor of the current node (if any).
  3. If there are unvisited neighbors, push them onto the stack (or make a recursive call) and repeat step 2.
  4. If there are no unvisited neighbors, backtrack to the previous node (pop from the stack or return from the recursive call).
  5. Repeat steps 2-4 until the stack is empty (or the recursion ends).

Applications of DFS

DFS has a wide range of applications in computer science and beyond:

  • Pathfinding: DFS can be used to find paths between two nodes in a graph, like finding a route on a map or the solution to a maze.
  • Cycle Detection: It is used to detect cycles in a graph, crucial in various applications, such as deadlock detection in operating systems.
  • Topological Sorting: In directed acyclic graphs (DAGs), DFS can be used to perform a topological sort, which is essential for tasks like scheduling.
  • Connected Components: DFS helps in identifying and counting the connected components within a graph.
  • Tree Traversal: When applied to trees (a specific type of graph), DFS can traverse a tree in different ways, including in-order, pre-order, and post-order traversals.

Now, let’s get practical and explore Python code examples for implementing the DFS algorithm.

Python Code Examples

DFS on an Adjacency List Graph

Suppose we have a graph represented as an adjacency list. We can implement DFS using a stack or recursion. Here’s an example using a stack:

def dfs(graph, start):
    visited = set()
    stack = [start]

    while stack:
        node = stack.pop()
        if node not in visited:
            print(node, end=' ') # Process the node (change this as needed)
            visited.add(node)
            stack.extend(neighbor for neighbor in graph[node] if neighbor not in visited)

Let’s break down the code:

  • We start with a stack containing the initial node (`start`).
  • We pop a node from the stack, visit it, mark it as visited, and push its unvisited neighbors onto the stack.
  • We repeat this process until the stack is empty.

DFS on an Adjacency Matrix Graph

If your graph is represented as an adjacency matrix, you can adapt the DFS algorithm accordingly. Here’s a Python example:

def dfs(matrix, start):
    n = len(matrix)
    visited = set()
    stack = [start]

    while stack:
        node = stack.pop()
        if node not in visited:
            print(node, end=' ') # Process the node (change this as needed)
            visited.add(node)
            neighbors = [i for i in range(n) if matrix[node][i] == 1 and i not in visited]
            stack.extend(neighbors)

In this code, we use a 2D binary matrix to represent the graph, where `matrix[i][j]` is 1 if there is an edge from node `i` to node `j`, and 0 otherwise.

Conclusion

Depth-First Search (DFS) is a powerful algorithm for traversing and exploring graphs in a systematic manner. Its versatility and wide range of applications make it an essential tool for solving various computational problems. By understanding the principles of DFS and practicing with code examples like the ones provided in this guide, you’ll be well-equipped to apply this algorithm effectively in your own projects and problem-solving endeavors. Happy graph exploration!

Understanding Quick Sort: A Divide and Conquer Sorting Algorithm

Sorting is a fundamental operation in computer science, used in various applications, from databases to search algorithms. There are numerous sorting algorithms, each with its own advantages and disadvantages. One of the most efficient and widely used sorting algorithms is Quick Sort.

Quick Sort is a comparison-based sorting algorithm that follows the “divide and conquer” paradigm. It was developed by Tony Hoare in 1960 and has since become a standard sorting algorithm due to its speed and efficiency. In this article, you’ll explore the inner workings of Quick Sort, understand its time complexity, and provide code examples in different programming languages.

How Quick Sort Works

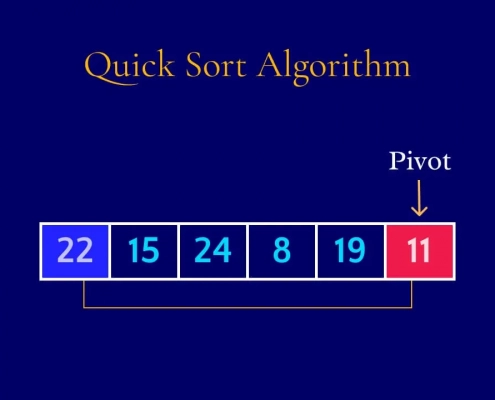
Quick Sort’s efficiency stems from its elegant and efficient divide-and-conquer strategy. The basic idea behind Quick Sort is to select a “pivot” element from the array and partition the other elements into two sub-arrays, according to whether they are less than or greater than the pivot. The sub-arrays are then recursively sorted.

Here’s a step-by-step breakdown of how Quick Sort works:

  1. Choose a Pivot Element: Select a pivot element from the array. The choice of the pivot can significantly affect the algorithm’s performance, but we’ll explore different pivot selection strategies later in this article.
  2. Partition the Array: Reorder the array elements so that elements less than the pivot come before elements greater than the pivot. The pivot itself is in its final sorted position. This process is known as partitioning.
  3. Recursively Sort Sub-arrays: Recursively apply Quick Sort to the sub-arrays on the left and right of the pivot until the entire array is sorted.
  4. Combine Sub-arrays: Since each sub-array is sorted, combining them in the correct order results in a fully sorted array.

Let’s dive into a code example to illustrate Quick Sort in action, using Python:

def quick_sort(arr):
    if len(arr) <= 1:
        return arr # Base case: an array with 0 or 1 elements is already sorted

    pivot = arr[len(arr) // 2] # Choose the middle element as the pivot
    left = [x for x in arr if x < pivot]
    middle = [x for x in arr if x == pivot]
    right = [x for x in arr if x > pivot]

    return quick_sort(left) + middle + quick_sort(right) # Recursively sort left and right sub-arrays

Now that we’ve seen how Quick Sort works conceptually and has a Python implementation, let’s delve into its time complexity and pivot selection strategies.

Time Complexity of Quick Sort

Quick Sort is known for its impressive average-case time complexity, making it one of the fastest sorting algorithms in practice. The average and best-case time complexity is O(n log n), where “n” is the number of elements in the array.

However, it’s crucial to note that Quick Sort’s worst-case time complexity can be O(n^2) if poorly chosen pivots consistently divide the array into unbalanced sub-arrays. To mitigate this issue, various pivot selection strategies and optimizations have been proposed.

Pivot Selection Strategies

  1. Random Pivot: Choosing a random element as the pivot can help avoid worst-case scenarios. By introducing randomness, Quick Sort’s performance becomes less predictable.
  2. Median-of-Three Pivot: Selecting the pivot as the median of the first, middle, and last elements of the array helps balance the sub-arrays and improves performance.
  3. Optimized Pivot Selection: More advanced pivot selection methods, like the “Introselect” algorithm, aim to choose the pivot intelligently based on the input data.

Implementing Quick Sort in Different Programming Languages

Quick Sort is a versatile sorting algorithm that can be implemented in various programming languages. Below, we provide code examples in JavaScript and C++ to demonstrate its cross-language applicability.

JavaScript:

function quickSort(arr) {
    if (arr.length <= 1) {
        return arr;
    }

    const pivot = arr[Math.floor(arr.length / 2)];
    const left = arr.filter(element => element < pivot);
    const middle = arr.filter(element => element === pivot);
    const right = arr.filter(element => element > pivot);

    return [...quickSort(left), ...middle, ...quickSort(right)];
}

C++:

#include <iostream>
#include <vector>

std::vector<int> quickSort(std::vector<int> arr) {
    if (arr.size() <= 1) {
        return arr;
    }

    int pivot = arr[arr.size() / 2];
    std::vector<int> left, middle, right;

    for (int element : arr) {
        if (element < pivot) {
            left.push_back(element);
        } else if (element == pivot) {
            middle.push_back(element);
        } else {
            right.push_back(element);
        }
    }

    left = quickSort(left);
    right = quickSort(right);

    left.insert(left.end(), middle.begin(), middle.end());
    left.insert(left.end(), right.begin(), right.end());

    return left;
}

int main() {
    std::vector<int> arr = {3, 6, 8, 10, 1, 2, 1};
    std::vector<int> sortedArr = quickSort(arr);

    for (int element : sortedArr) {
        std::cout << element << " ";
    }

    return 0;
}

Conclusion

Quick Sort is a highly efficient and widely used sorting algorithm that leverages the divide-and-conquer strategy to achieve impressive average-case time complexity. While its worst-case scenario can be inefficient, smart pivot selection strategies and optimizations help mitigate this issue. Quick Sort’s versatility allows it to be implemented in various programming languages, making it a valuable tool in a programmer’s arsenal for sorting large datasets efficiently. Understanding Quick Sort and its inner workings is essential for anyone dealing with sorting algorithms and performance optimization in computer science.

Understanding Merge Sort: A Divide and Conquer Algorithm

Sorting is one of the fundamental operations in computer science. It involves arranging elements in a specific order, often in ascending or descending order. There are various sorting algorithms, each with its own strengths and weaknesses. One of the most efficient and widely used sorting algorithms is Merge Sort. In this article, you will delve into the details of Merge Sort, exploring its principles, implementation, and performance.

Introduction to Merge Sort

Merge Sort is a comparison-based sorting algorithm that employs a divide-and-conquer strategy. This means it divides the input array into smaller sub-arrays, sorts them individually, and then merges them back together to produce a sorted array. The core idea behind Merge Sort is to repeatedly divide the unsorted list into smaller sub-lists until each sub-list contains a single element. Then, these sub-lists are merged back together in a way that maintains the order, creating a sorted output.

Merge Sort offers several advantages:

  1. Stable Sorting: Merge Sort is a stable sorting algorithm, which means that it preserves the relative order of equal elements in the sorted output. This property is essential in many applications, such as sorting database records.
  2. Predictable Performance: Merge Sort exhibits consistent performance, with a worst-case time complexity of O(n log n) for sorting an array of n elements. This makes it a reliable choice for sorting large datasets.
  3. Parallelizable: Merge Sort can be efficiently parallelized, taking advantage of multi-core processors or distributed computing environments. This makes it suitable for handling large datasets in modern computing scenarios.

The Merge Sort Algorithm

Merge Sort can be understood as a three-step process:

  1. Divide: The input array is recursively divided into smaller sub-arrays until each sub-array contains only one element. This is the base case of the recursion.
  2. Conquer: The individual sub-arrays are sorted. In the base case, sorting a sub-array of one element is trivial since it’s already sorted.
  3. Merge: The sorted sub-arrays are merged back together to produce a single, sorted array. The merging process ensures that the order of elements is preserved.

Pseudocode for Merge Sort

Before diving into the code implementation, let’s look at the pseudocode for Merge Sort:

MergeSort(arr):
    if length of arr <= 1:
        return arr

    // Divide the array into two halves
    mid = length of arr // 2
    left_half = arr[0:mid]
    right_half = arr[mid:end]

    // Recursively sort both halves
    left_half = MergeSort(left_half)
    right_half = MergeSort(right_half)

    // Merge the sorted halves
    return Merge(left_half, right_half)

Merge Function

The `Merge` function is responsible for merging two sorted sub-arrays into a single sorted array. Here’s the pseudocode for the `Merge` function:

Merge(left, right):
    result = []
    while left is not empty and right is not empty:
        if left[0] <= right[0]:
            append left[0] to result
            remove the first element from left
        else:
            append right[0] to result
            remove the first element from right

    // If there are remaining elements in left or right, append them
    append remaining elements in left to result
    append remaining elements in right to result

    return result

Implementation in Python

Now, let’s implement the Merge Sort algorithm in Python with code examples. We’ll create a recursive function `merge_sort` and a `merge` function to merge two sorted arrays.

def merge_sort(arr):
    if len(arr) <= 1:
        return arr

    mid = len(arr) // 2
    left_half = arr[:mid]
    right_half = arr[mid:]

    left_half = merge_sort(left_half)
    right_half = merge_sort(right_half)

    return merge(left_half, right_half)

def merge(left, right):
    result = []
    while left and right:
        if left[0] <= right[0]:
            result.append(left[0])
            left.pop(0)
        else:
            result.append(right[0])
            right.pop(0)

    result.extend(left)
    result.extend(right)
    return result

Let’s test the `merge_sort` function with an example:

arr = [38, 27, 43, 3, 9, 82, 10]
sorted_arr = merge_sort(arr)
print(sorted_arr) # Output: [3, 9, 10, 27, 38, 43, 82]

Performance Analysis

Merge Sort’s performance is remarkable, with a consistent time complexity of O(n log n) in all cases, whether the data is already partially ordered or completely random. This makes it suitable for a wide range of applications.

However, Merge Sort does come with some trade-offs:

  • Space Complexity: Merge Sort requires additional memory to store the sub-arrays during the merge phase. In the worst case, it can have a space complexity of O(n), which may not be suitable for sorting extremely large datasets with limited memory.
  • Slower for Small Arrays: For small input sizes, Merge Sort can be slower than simpler sorting algorithms like Insertion Sort or Bubble Sort. This is due to the overhead of recursion and merging.

Conclusion

Merge Sort is a highly efficient and versatile sorting algorithm based on the divide-and-conquer strategy. It offers stable sorting, predictable performance, and parallelizability. While it may have slightly higher space complexity and overhead for small input sizes, its O(n log n) time complexity makes it an excellent choice for sorting large datasets efficiently.

Understanding the principles and implementation of Merge Sort is valuable for any programmer or computer scientist. It serves as a fundamental example of a divide-and-conquer algorithm and is a building block for more complex algorithms used in various applications.

Mastering Dijkstra’s Algorithm: A Guide with Code Examples

Dijkstra’s Algorithm, developed by Dutch computer scientist Edsger W. Dijkstra in 1956, is a fundamental and widely used graph search algorithm. It is primarily employed to find the shortest path between two nodes in a weighted graph. Understanding Dijkstra’s Algorithm is crucial for various applications, including routing in computer networks, navigation systems, and optimization problems.

In this guide, you will be able to delve deep into Dijkstra’s Algorithm, breaking down its core concepts, and step-by-step implementation, and providing code examples in Python to help you grasp its intricacies.

Prerequisites

Before diving into Dijkstra’s Algorithm, you should be familiar with basic graph theory concepts such as nodes, edges, weighted graphs, and directed/undirected graphs. Proficiency in a programming language like Python will also be beneficial.

Key Concepts

1. Graph Representation

To implement Dijkstra’s Algorithm, we first need to represent our graph. There are various ways to do this, but one of the most common methods is using an adjacency list or an adjacency matrix.

  • Adjacency List: In this representation, each node maintains a list of its neighboring nodes along with the edge weights. It is memory-efficient for sparse graphs.
  • Adjacency Matrix: This representation uses a 2D matrix where rows and columns correspond to nodes, and the cell values represent edge weights. It is suitable for dense graphs.

2. Priority Queue

Dijkstra’s Algorithm relies heavily on efficiently selecting the node with the shortest distance. A priority queue is used to store and retrieve nodes based on their tentative distances. Common data structures like heaps are often employed to implement priority queues efficiently.

3. Algorithm Steps

The algorithm proceeds through the following steps:

  1. Initialize distances from the start node to all other nodes as infinity and the distance from the start node to itself as 0.
  2. Create an empty priority queue and add the start node with a distance of 0.
  3. While the priority queue is not empty:
    a. Pop the node with the smallest distance from the priority queue.
    b. For each neighboring node, calculate the tentative distance through the current node.
    c. If this tentative distance is less than the previously recorded distance, update it.
    d. Add the neighboring node to the priority queue if it hasn’t been visited.
  4. Repeat step 3 until the priority queue is empty or the target node is reached.
  5. The algorithm concludes with the shortest path from the start node to all other nodes and their respective distances.

Python Implementation

Now, let’s implement Dijkstra’s Algorithm in Python. We will use an adjacency list to represent the graph and a min-heap for efficient node selection.

import heapq

def dijkstra(graph, start):
    # Initialize distances with infinity for all nodes except the start node.
    distances = {node: float('inf') for node in graph}
    distances[start] = 0

    # Create a priority queue and add the start node.
    priority_queue = [(0, start)]

    while priority_queue:
        current_distance, current_node = heapq.heappop(priority_queue)

        # Skip if the node has been processed already.
        if current_distance > distances[current_node]:
            continue

        # Explore neighbors.
        for neighbor, weight in graph[current_node].items():
            distance = current_distance + weight

            # If a shorter path is found, update the distance and add the neighbor to the queue.
            if distance < distances[neighbor]:
               distances[neighbor] = distance
               heapq.heappush(priority_queue, (distance, neighbor))

   return distances

# Example usage:
graph = {
    'A': {'B': 1, 'C': 4},
    'B': {'A': 1, 'C': 2, 'D': 5},
    'C': {'A': 4, 'B': 2, 'D': 1},
    'D': {'B': 5, 'C': 1}
}

start_node = 'A'
shortest_distances = dijkstra(graph, start_node)
print(shortest_distances)

Conclusion

Dijkstra’s Algorithm is a powerful tool for finding the shortest path in weighted graphs. It has widespread applications in computer science, mathematics, and real-world scenarios. Understanding its key concepts and implementation in Python will equip you with the skills to tackle a wide range of problems that involve pathfinding and optimization.